Showing posts with label Video. Show all posts

Thursday, 28 April 2022

Thanks


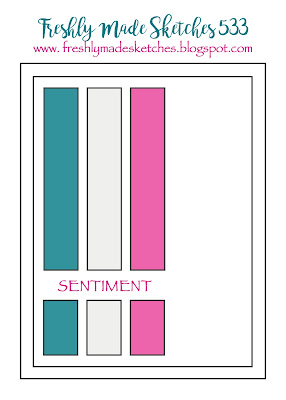
Today I saw the sketch at Freshly Made Sketches and I loved it so thought I would make a few cards using it. This is the first of those.

I made a quick video showing a couple of ways to attach intricate die cuts to projects.

I think that the Micro Dots are a great idea.
The embossing folder is by Nellie Snellen and the sentiment by Penny Black.


Monday, 14 February 2022

Happy Birthday

The challenge at Just US Girls this time is to make your own stencil. I didn't actually use dies, as I often do, but used my cutting machine instead. I didn't do a brilliant job and and I've since ordered a new blade, but there was enough which cut properly for my purposes. I used my home made embossing paste and twinkled it with Glamour Dust. This is a link to a video which shows how I made the paste.
https://youtu.be/gfIae0VBFF8
The flowers are by Alexandra Renke and I shaped the bells with an embossing tool and added a little foam tape behind them to keep the shape.


Friday, 2 August 2019

Yet another flower die


I really enjoyed making the  last card I posted and so as I had some more of the woodgrain background I thought I would make a similar card using a different flower die and sentiment. This flower from a Pink Fresh set just arrived  and so I was eager to try it out. I layered it several times and added the infils to just the bottom layer. I like the way the deep grey card base makes the flower a little more impactful! To make the panel I had to use a die much shorter than I needed, so I had to cut it part way from both ends, turning the card around and moving the die in between cuts. As it was quite a stretch there was one little bit which wasn't a perfect cut over the join, so that is hidden behind the large leaf! Here's a quick video of how I do it!

It's for the challenge at Seize the Birthday where the topping is Flowers!

Sunday, 22 February 2015

Another video... Mixing Embossing powders


I made this video a few weeks ago but the editing software I was using didn't allow me to upload it to YouTube. Today my son showed me what to do to get round the problem and so here it is. I have blogged the card before but I thought I would just pop it here again together with the video.
Isn't it great to have clever children!


Saturday, 31 January 2015

Lucky Dip at Less is More

The challenge at Less is More this week is entitled Little Ones
There are a few ways of interpreting this theme and it will be interesting to see what appears in our gallery.
Here is a Welcome to the world card for a little one. The tiny shoes are from a Joy Craft die, the tag and the welcome word are from Paper Smooches.
Here's a variation using a Papertrey Ink Giraffe stamp and die.

Here are a couple of pictures of a card I made with lots of little hearts streaming from an envelope.
The envelope was made from Spellbinders Labels die... I thought it made a great envelope.
Here's how I made it!

I think it's great to exploit the resources we already have and make them do more than originally intended.
More die cutting here, but just as the manufacturers intended this time. Shoes - Joy Craft, baby - Simon Say Stamp, Congratulations - Tattered Lace.
As always, I add double sided tape to the reverse of the card before cutting fiddly shapes... it makes adhering them so much easier.

Tuesday, 27 January 2015

Valentine

I wanted to make some Valentine cards to take to my choir and was trying to think of something a little different. I came up with the idea of triple embossing, something I have done many times in the past but always with a deeply etched stamp. This time I used an embossing folder!
Details of the process are in this video.

The tiny hearts are embossed from a Stampin' Up tiny stamp from the confetti set. The scalloped edge is from a Lawn Fawn die, the frilly heart is Simon Says Stamp and the sentiment from a Winnie and Walter Big and Bold set.
The Card Concept Challenge has a Love theme so this is for that.
Timeout has the challenge, Valentine's Day with the optional twist of hearts... there are quite a few hearts here!

Saturday, 24 January 2015

Less is More has a sketch!

Here is a simple interpretation of the sketch. The vertical panel was cut with a SSS stitched die, reduced in size to much skinnier proportions. The heart is also from Simon Says Stamp and the butterfly is from Memory Box.

This is another card using the same die as an earlier card.
Here is a little video showing how I made it, with apologies for forgetting to turn the image the right way up!
I hope you like it!
This one is straying a little from the sketch but I couldn't bear to cut dowm the vertical panel any more... I just love the colours in the background.
It was made with Weathered Wood, Peeled Paint and Forest Moss Distress ink refills dabbed onto my glass mat, spritzed with water and then dabbed with absorbent card and left a while for the colours to be absorbed by the card. When dry, it was overprinted  with black ink and then other images embossed in gold. The butterfly is from Memory Box and the sentiment from Wplus9.


Tuesday, 20 January 2015

Real Quickie

This is a really quick tip for you, whilst I'm trying to get the better of You Tube technology!
You probably know this already, but for those who haven't seen it before, it's a really useful tip which I discovered quite some time ago, but use ALL the time.
I hope you find it useful!
For larger dies, I either add tape in several strips in order to cover the required area, or use  double sided adhesive in sheet form. I can buy that at The Range stores.

Monday, 29 December 2014

A second attempt


Here is a short video to show how you can make a length of straight border fit around a circular or oval shape.

Extending Dies


My son bought me a new web-cam for Christmas so that I could take some videos of various craft projects and tutorials.

All I need to do now is to get my head around how to use it!

Here is a practice piece!

I hope it will be useful to someone!

I will get better hopefully!

Saturday, 10 April 2010

One Stop Crafts - On the Move


It is my turn to set the Challenge this week at One Stop Crafts and I chose 'On the Move'. Any kind of movement on a card is great for this challenge, so shaker cards and cards with flaps, waterfall cards or anything else you can dream up will be perfect.
I decided to make a Spinner Card, and this little teddy from Pollycraft is a super subject to spin.
I thought that I would also include him in another couple of challenges. Pollycraft's 'Anything Goes' and Cooking it Up with Katie's Recipe Challenge of Something Old (the sentiment) Something New (the SU Stamp) and Something Sweet ( I think this little bear is SO sweet!)
He was coloured with Copics and cut out, then a penny was stuck behind his tummy, then another penny was stuck to the first one using a circular 3D pad.
I made the track for him to spin along with a Word Window punch from Stampin' Up. The track fits between the two pennies.
You would need to raise this track from the surface of the card to give room for the pennies to rotate, so I added the grass section to the base of the card using 3D tape.
The houses are from a Jumbo Wheel stamp also from Stampin' Up.
I have added a little video for you to see him tumbling along. (It's my first attempt at video, so please be kind!)