Saturday 31 August 2019

Distress Inks


I'm afraid that the colour doesn't show up too well on this picture. The card base is deep brown and the inks used to splash on the card for the foliage are all shades of brown plus a little white and a smear of gold.
I began with the sketch from Fab Fridays
This is a challenge that I have come across only recently. I used a stirip of hessian plus a pennant shaped die cut and a sentiment from Sugar Peas Designs, which I heat embossed in white.
Just US Girls has the challenge to

 I die cut the two foliage sprigs from Alexandra Renke and kept them in the card from which they were cut. Next I splashed and dropped some Distress Inks over the card in Brushed Corduroy, Gathered Twigs, Frayed Burlap and Picket Fence, using the ink straight from the refill bottles. I spritzed with water to make the ink move around a little and then heat dried. After I had carefully taken the die-cuts from the card I smeared a little Brilliance Gold ink over a few edges.
I split a length of string as it was a little thick and tied a tiny bow, curling the ends around the handle of a paintbrush. The base of the card wasn't intended to be the deep brown, but an escapee tiny drop of ink meant I had to cut the front of the card down a little to avoid it, before remounting the panel...but I rather like the end result!
I will probably do another card actually splashing something directly onto the card base, but I hope this will do in the interim.

Hello


This seems a good title for a blog post today, as I haven't said hello to my craft room in about a week whilst we were entertaining two of our grandchildren for the last full week of their school summer holidays. The time has been spent visiting a National Trust property at Petworth, Jane Austen's House at Chawton, The Mary Rose  in Portsmouth Dockyard and the obligatory visit to a local toy store! I also taught them both to knit... one more successfully than the other I hasten to add
Today however, is for relaxation!

Anyway this card came about when I saw the challenge at TIMEOUT
.
As the challenge is sponsored by Winnie & Walter, the colours of their logo made me want to emulate it, so I chose a background stamp from Kaisercraft and inked it with similar rainbow colours.... these are tiny dots rather than the huge circles of the logo.
I used one of their In a Word Cutaway dies. I have a few of these and love how bold they are. I'm not even sure if they are still available. Anyway I decided to layer this and inlay the die cuts. The sun is from a die from Lawn Fawn, layered and popped onto dimensional pads. I quite like the muted effect of the colours.
Now for a little catching up on crafting!

Friday 23 August 2019

You're a deer


After the frustrations of this morning, this card was more straightforward.

I chose several challenges to base the design on.
AAA Cards - Could be any of quite a few Christmas songs... I think I'll go with White Christmas

ABC Christmas - R is for Reindeer
Merry Little Christmas  - anything Christmas

The tree line die is from Memory Box, the elf from Hero Arts and the sentiment and reindeer from MFT

One of those days


Have you ever had one of those days that starts full of ideas and promise and just becomes one frustration after another?
Well that's what I've had today. I saw a couple of challenges which spurred me into action, but then things started to go pear shaped.
I saw this inspiration photo at Just add Ink!

I got out my corresponding colour set of Distress Inks Faded Jeans, Weathered Wood, Hickory Smoke, Milled Lavender and Seedless Preserves and the stamp from Kaisercraft and decided to do an ink lift technique. So far so good. I inked a panel, stamped and  clear embossed and lifted the ink... still OK!
Because I wanted to use this sketch from CAS(E) this sketch

I needed a diecut or something in place of the star. I wanted a watch to be in keeping with stamp. I had a die set, (this one) but I actually thought it was a little large, so I went to my Silhouette to see if I could download a cut file which I could size appropriately, only to find that my software needed upgrading before I could do anything. This took an age, but I got there only to find that there really wasn't an image that I liked. Back to square one, so I decided I would have to use my existing die from All Occasion Dies.
I chose the edging for the panel as it reminded me of the cogs in a watch!
Next came the sentiment... I searched through my sentiments as I wanted some reference to time but couldn't find one so I thought I would do one on my computer, only to find that having messed about with it upgrading the Silhouette software, it wouldn't print to my printer but just went PRINT TO FILE and I'm blowed if I know how to get it back to normal!
Any suggestions would be most welcome!
So then I had to choose a different sentiment and came up with this one. I have scrawled on the stamp package A little Sentimental, but sadly not the manufacturer.
I'll continue to try to sort my printing problem, otherwise I'm up a gum tree!

PS
Just did a restart and I can print again!
SO here is the edited version with a computer generated sentiment, which says what I wanted it to!

Wednesday 21 August 2019

Birthday butterfly

Here I've been having yet more fun colouring die cuts. I began by dipping this Alexandra Renke butterfly in a few puddles of different green Aqua Tint Inks from Spectrum Noir, spritzed it with water and allowed to dry. I then stamped a tiny script stamp from SU (French Foliage) in Frayed Burlap DI, inked the body with Frayed Burlap and went around the edges with some Brilliance Gold Ink. Then I stuck a whole bunch of sequins randomly over it. I die cut the Memory Box (Distressed Baptisia Collage) corner die  from the front panel  and stamped the sentiment also in Frayed Burlap. I had always found it difficult to stamp with Distress Inks, but having a stamping tool like the MISTI means that any gaps can be accurately overstamped and a perfect image achieved.
Seize the Birthday - Butterflies

Tuesday 20 August 2019

No Stamping


I just found yet another challenge which intrigued me! It's called Just Add Ink and this week the challenge is make a project with NO STAMPING
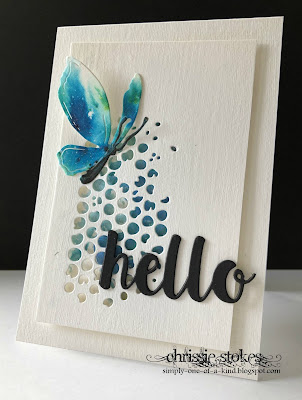
SO this is what I made. I cut the butterfly from a piece of  card coloured with watercolours. Actually it was cut from a previous failed card but I thought the colours too nice to simply chuck. I managed to get the black part to line up with the body and simply added a little more with a marker. The panel was cut with a Sizzix die and a bit of smooshed card from my 'too good to throw away drawer' which was in keeping with the colours of the butterfly was placed behind this die cut. All that was left to do was add a die cut sentiment which I layered for a little extra strength. Sometimes it pays to be a bit of a squirrel.

Pink Fresh


Another spot of die cut colouring!
This time with alcohol markers.
I took the colours from the challenge at JUGs

I began by cutting out the Pink Fresh dies and colouring them with markers. It's not incredibly evident but the red is in the centres of the blooms, now partially obscured by the pearls which I decided to add at the last minute. The simple sentiment is from Altenew. I  love the combination of grey and pink.


Memory Box Challenge


I just found a new (to me) challenge called Outside the Box, which is part of Memory Box. As many of you know I love die cutting and Memory Box is one of my favourite companies, so I just had to have a go!
The challenge this time is Warm Colours
Monthlythemebadge
To make the card I simply cut the front panel with the solid butterfly die and cut the top layer of filigree butterflies from a separate piece of card. I coloured the backdrop with Distress Inks, applied with sponge daubers. The filigree butterflies were then inlaid into the gap and the sentiment from Altenew stamped beneath it! I think I may add a little pearl to each body.. I think it needs just a little something!

Saturday 17 August 2019

New Butterfly


I just received this new die.. it's by Alexandra Renke  and I've wanted to try one of these 
three quarter view die cuts for some time. I began by cutting out the butterfly and then adding colour by using some paper towels that I had used for mopping up other projects (and saved specifically for this purpose) and transferring the colour to the die cut by spritzing with water and pressing the towels onto the card.

I used the colours from Color Throwdown daubing on a little Frayed Burlap ink to define the body of the butterfly. I overprinted the wings with a script stamp from Stampin' Up in the same ink.
The hexagons are also designed by Alexandra Renke.
I've really been enjoying colouring die cuts of late, you  can achieve some really interesting results!

A couple of Christmas Cards


Here are another couple of cards for my Christmas supply, each for a different Christmas Challenge.
The first one is home-made, white embossing paste applied through part of a Sweet Poppy Stencil. I added WOW Metallic Embossing glitter and heat set it. This paste spreads really easily, I just hope that I can recreate it when this lot has been used. The sentiment is from Tim Holtz.
It's for the Glitter Challenge at CAS Christmas


This next one is for the challenge at Christmas Kickstart

"Dachshund through the snow"

Naturally they would love to see a pooch!
  
Well I have a dog and there is snow, so hopefully it will fit the bill!
.
The tree line die was a freebie from a mag and the dog  is a die from an All Occasion Dies set. The embossed snow is from an embossing folder from Sheena Douglass but sadly is not available at the moment.

Cherry Blossom

Earlier this year we were lucky enough to take a fabulous cruise on Cunard's Queen Elizabeth. We began in Japan just in time to see the cherry blossom, particularly in the north of the country. It was truly spectacular.
This was in Aomori.
As a tribute I got this die of cherry blossom by Alexandra Renke, which I coloured with Distress inks.
It's a simple card, but colouring die cuts has been fun. There'll probably be more to follow!
The Flower Challenge has the theme of Your Favourite Flower... that is such a hard choice as I love so many, but cherry blossom being a sign of Spring, is certainly one of my favourites.

Friday 16 August 2019

Nautical Twofer


It's time for another Twofer over at Darnell's blog. I find these challenges really ... what shall we say? .... challenging!
The theme  this time is Nautical
 

For the landscape card, I used a stencil from Neat & Tangled called Rice Paddies and I love it. With this I used some home made embossing paste and it worked beautifully. I had added some extra PVA glue to the mix and it was much better. 
Here is my amended recipe
  • 1/2 cup of talc
  • 1 tablespoon of White Acrylic paint
  • 2 tablespoons of PVA Glue
After I had masked and spread paste over part of the stencil, I removed it from the card and sprinkled over some WOW Vintage Peacock embossing powder. I waited until it had dried out somewhat before heat setting. It was a fabulous twinkle.


The silver heat embossed sentiment is from The Alley Way stamps. I simply added a whole shoal of little silver die cut fish.
Freshly Made Sketches


The second card uses the same fish over an ocean daubed with Distress inks, and stamped with some white acrylic paint grunge dots. It's topped with a die by La La Land Crafts of Sea Bubbles. The sentiment here was computer generated. As I inlaid this die, I still have the negative die cut to use on another card!
What fun!

Wednesday 14 August 2019

BIG HUG


When I saw the challenge at CAS(e) this Sketch, this stamp set from the Stamp Market came to mind.
I stamped the broader image in Baja Breeze ink and then overstamped with the black thinner line. The MISTI was  a great help with this!
The scrap of DP is from Stampin' Up and the hugs and kisses die cut from Cutplorations.
Today we took a friend out to lunch to celebrate her birthday... albeit a trifle late. She chose the Noisy Lobster in Mudeford... it was fabulous! Thoroughly recommend it! 

A sketch

I've been having a bit of fun colouring some die cuts. I began by dropping a few shades of green Aqua Tints onto the cut pieces of card, they did swim around a little, but the different shades did have an effect. Once dry I still wasn't really thrilled with the result so I daubed on a little Distress Ink around the edges, still not quite there, so I darkened the stalks with a marker. I decided to leave it at that!
I mounted the stalks on a piece of textured die-cut, kraft card and added a tiny sentiment from WPlus9.
I based the layout on the sketch from Colours and Sketches but reversed the orientation. A few tiny brown pearls completed the card.


Tuesday 13 August 2019

Noel

Here is another contribution for the CAS Christmas Challenge, which this time is to use Glitter.


I made some embossing paste, but I think that the recipe could do with a little more glue in it than I used this time... the Gitter didn't adhere to it as much as it would have done to a commercially produced embossing paste. I guess I could just put some more glue in and see what happens. However, I don't mind the result.... in fact I was just pleased that the embossing paste worked out at all as it was the first time that I had tried making it!
I used a Sweet Poppy Stencil for the tree and a Sizzix die for the sentiment! As that is popped on dimensional pads like the tree I layered it to make it a little more robust.
Merry Little Christmas - Anything Goes
Just Us Girls - Circles

Driving Home for Christmas


I found it fun to assemble this die cut truck, I had thought that it would have been a pain to do and put off using this set for quite some time. I cut all the pieces I needed in one go, from white card and coloured the individual pieces with alcohol markers plus Silver Wisp of Stella. Once assembled I popped it onto dimensional pads and added it to a dry embossed stitched square.
I thought I would add it to the challenge at Inkspirational
Merry Little Christmas - Anything Goes

Monday 12 August 2019

O Tannenbaum

The challenge at  Christmas Kickstart has a rather special guest this time... the wonderful Darnell!
She was the creator of the Twofer Challenge an in her honour the challenge is to make two cards with the same Christmas tree image.
Here I used an oldie but goodie from Stampin' Up Th one on the left was simply gold heat embossed with a sentiment of Penny Black stamps, the one on te right was stamped with Versamark, and clear embossed then coloured with Copic markers and a few trails of Clear Star Gelly Roll marker added. The sentiment here was computer generated as I couldn't remember if I had a stamp with these words. The two frames are from Alexandra Renke dies.

This is also for the challenge at Merry Little Christmas

              MLCCB #13 - August Anything Christmas Goes


Circles


The Challenge at Just us Girls this time is Circles


I used a die by Alexandra Renke for the focal point,  cut from kraft card and gently shaded with a little Distress Ink around the edges. The sentiment is part of stamp from Altenew... I masked off the last couple of words (to you) as it was too long for the card. I had a bit of a struggle to make the die extend far enough to encompass the words, but managed on about the third or fourth attempt.
I thought that the hessian and the rough string complemented the kraft card quite well. I added a few random dark brown pearls (more circles) for a little interest.
Anything Goes with Dies
HELP PLEASE!
I have recently bought a Magnetic Platform for my Big Shot Plus die cutting machine, but find that particularly small dies, like the one used to cut the sentiment on this card, don't stay where they are placed on the platform but jig around as though the magnets are pushing them rather than attracting them. Has anyone else come across this phenomenon? I have written to Sizzix but not received any response to date. I'm not sure if this happens with all Sizzix Plus platforms or whether mine has a problem!!!
Any comments would be appreciated!

Sunday 11 August 2019

Shimmer


Here is another card for the challenge at CAS Stencil.

I had tried unsuccessfully to unblock many of my shimmer sprays (which have not been in use for quite some time) and so finally simply decanted a little into another mister to use on this card. It's Cosmic Shimmer Sunlight Mist. I bought the stencil following a retreat in Swindon with Happy Little Stampers, where Kathy, one of the attendees had just bought it from a local craft store, needless to say I had to purchase one too! I loved it then and love it still. It's from The Crafter's Workshop!
 The diecut flower is from Pink Fresh.
The panel on this card is a save from a bit of a booboo. I was stamping a sentiment for another card and dropped my inkpad onto it. As this is quite thick card I decided to use the other side for this card. Recently I have been using some Hemp cardstock from Paper Mill Direct. The reverse side is not textured, so I decided to emboss it with a plate from Papertrey Ink. After doing it I think I actually prefer the reverse side of this embossing but it was done and so that's that.. I'll remember next time... perhaps!
Several people have emailed recently asking about the card I have been using of late.... if you can't get a textured card in your part of the world, you can always stamp your card and then emboss a texture onto it afterwards, as I have done here. I quite like the dark chocolate cardstock which I used for the card base and die cut, against the subtle gold shimmer!

Saturday 10 August 2019

More die cuts


A quick card for a couple of challenges.
Simple die cut dog and cat and a stamped  sentiment from Altenew, all popped onto a raised panel. 
Make it Monday - Friendship
AAA Cards Make it in Minutes


This one is for the challenge at The Male Room where they are having a celebration to commemorate 6 Years... quite an achievement! Congratulations girls definitely worth raising a glass or two!
Bit of a die cutting bonanza today!